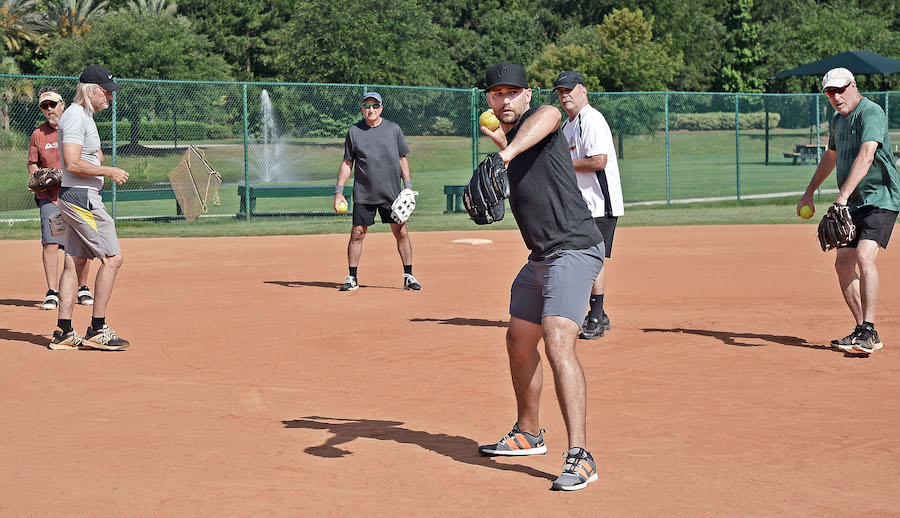
In slowpitch softball, throwing is one of the most critical skills – it will be the foundation for making plays, getting outs and contributing to the team.
But for beginning players who didn’t play baseball or softball in their youth, throwing can be a confusing, difficult skill to master. In this article, we’ll go over a few helpful tips so that you can improve your throwing technique quickly, in a step-by-step manner.
Step 1: Focus on Your Footwork First
If your footwork isn’t right, your throwing mechanics won’t be right, either. Many people want to separate fielding from throwing as separate skills, but in reality they are permanently linked, and both need to be practiced.
Improving your fielding technique will be the first thing you need to do to set a strong foundation for better throwing.
Step 2: Move Your Glove to Your Center After Fielding
This technique, called “funneling a ground ball” is critical for getting the hands into the same, consistent starting position for each throw.
After a ground ball is fielded, ALL high level players “funnel” the ball–bring it to their belly button–and then begin their throwing motion from there. On fly balls, this is the essentially the same, except the ball is brought from above the head down to the center. In both instances, the throwing motion now has a consistent, centered position from which to begin.
This leads to much greater consistency and better mechanics as a whole.
Step 3: Move the Feet FAST
The feet need to begin moving–FAST–toward the target once the ball is held at the center of the body. This is one of the absolute most important habits to develop, as fast footwork not only closes the gap between you and your target, but also contributes velocity from the speed of the body.
If the body is moving 4 miles per hour because of fast footwork, the final throwing speed will be 4mph + [your throwing speed]
Step 4: Separate the Hands Downward, then Back
The hands will “break” downward, meaning the glove arm and throwing arm begin to go their separate ways at this point.

As the throwing arm separates from the glove, it will pull backward, behind the body, as the throwing arm shoulder blade pinching back. This is an important step that “connects” the throwing arm to the torso as it begins to rotate shortly thereafter.
Step 5: The Glove Arm “Swims” Out and Around
The glove arm is important, and helps to rotate the hips and core faster than without it.
We don’t want the glove arm to stay in front of the chest or stuck to the body. It should extend out and around, then fall to the glove side of the body as the torso begins to rotate.
Great Summary Video on Slowpitch Throwing – For Beginners
Watch below as I cover and demonstrate many of the tips in this article.
Are you just going to accept that your throwing arm isn’t very strong?
If you answered NO, then watch my free throwing webinar below, which goes into more detail with more tips and instruction.